Vault Bridge Settings
Use the Bridge page to set up the connect or "bridge" between the pVault® system and your accounting/ERP system.
This "bridge" provides data lookups for indexing documents and throughout APFlow™ Invoice Entry (including Routing and Approval).
Note
A page with the same functionality exists within APFlow™ Settings, but the full procedure to configure the bridge for both pages can be found below. See APFlow™ Bridge for more information.
Important
The fields that display on this page may be different depending on the accounting system to which you are bridged. Before you successfully bridge to an accounting system, None displays in the visible fields.
From My Paperless, click .
In the Vault Settings navigation bar, click .
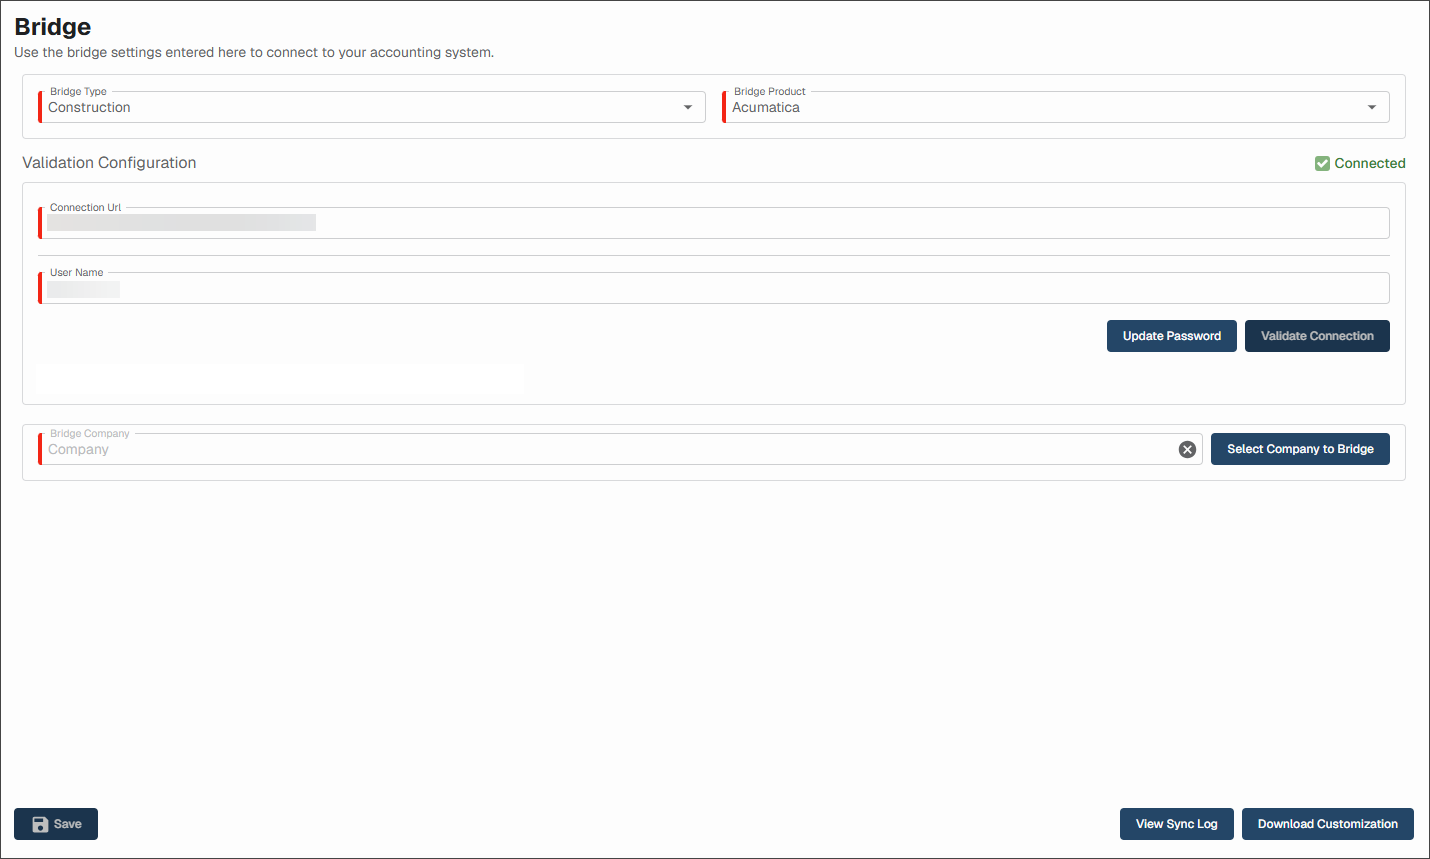
The following page displays:
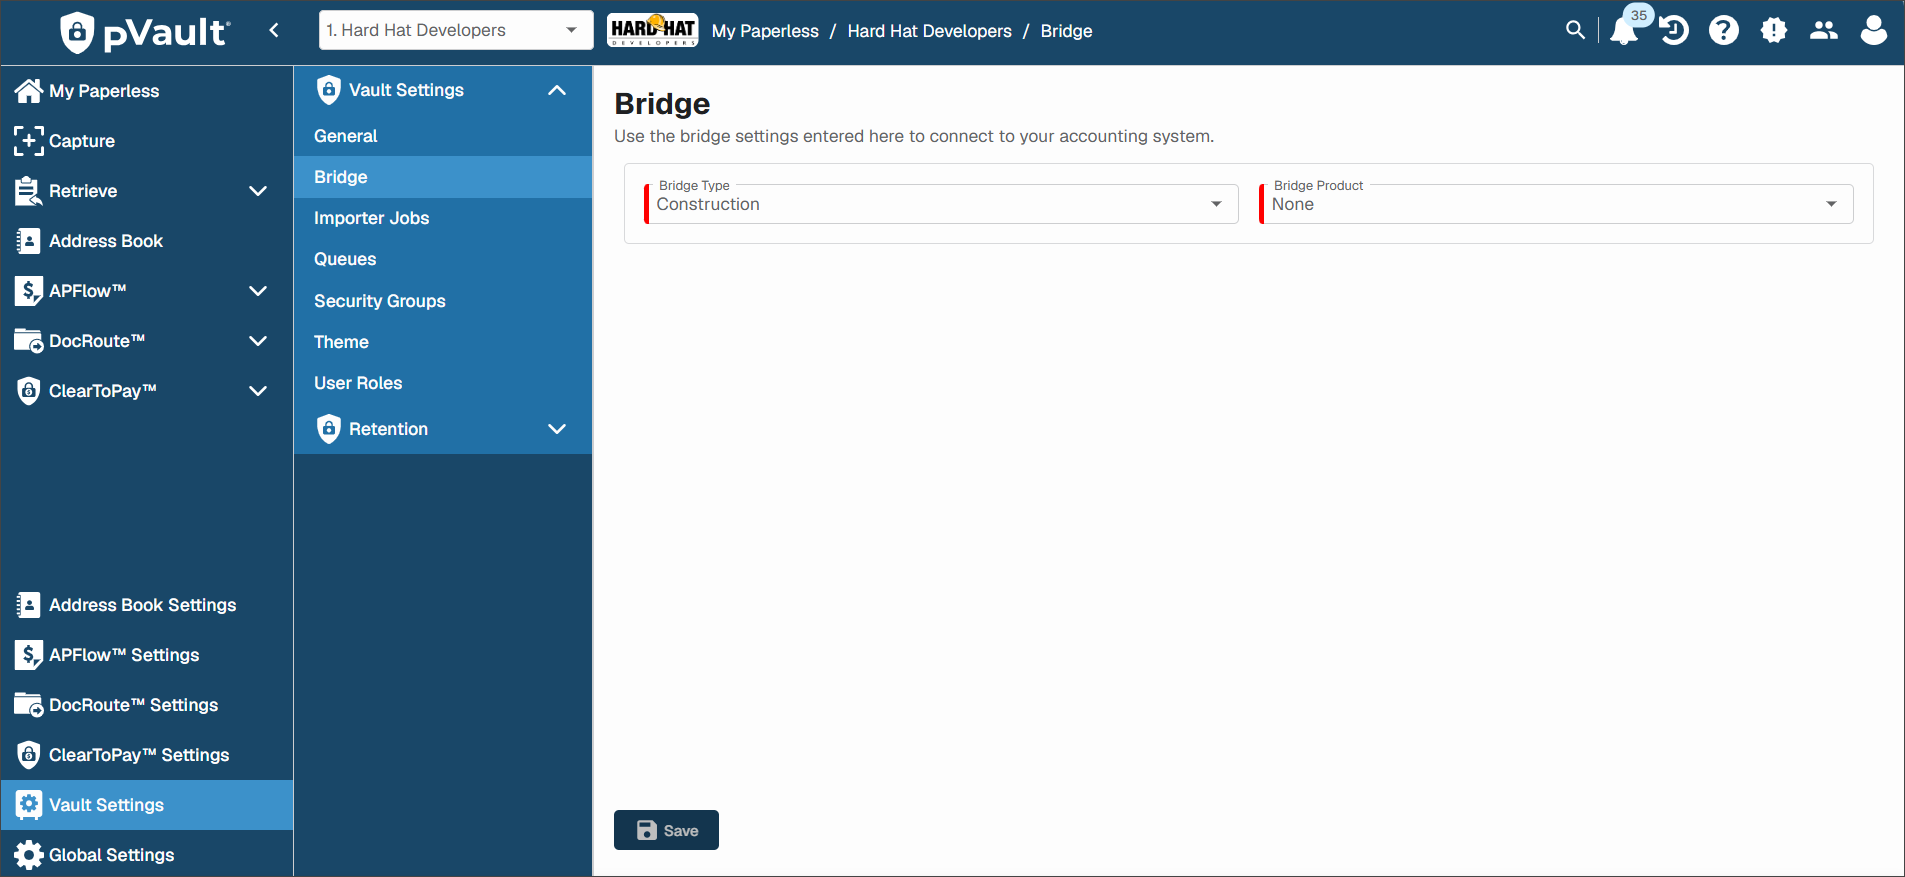
From the Bridge Type dropdown, click to select the appropriate bridge type.
The Bridge Type dropdown reflects the business categories available. Construction in the most common choice in pVault.
Note
If the Bridge Type dropdown is set to , then the Bridge Product field is not active.
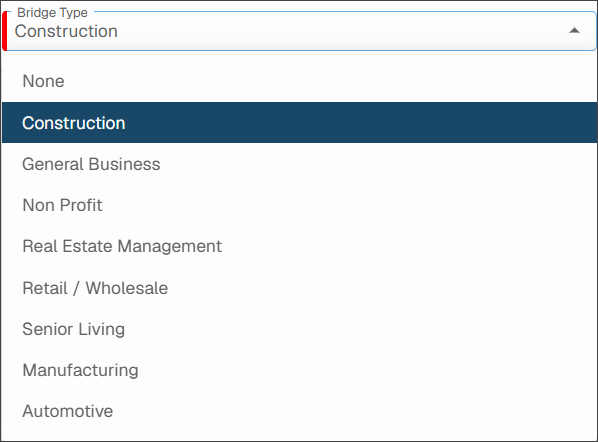
From the Bridge Product dropdown, click to select the appropriate accounting system.
The Bridge Product dropdown is connected with the bridge type and reflects those accounting systems associated with a specific business category. Based on the selected Bridge Type and Bridge Product, the remaining fields that display on the Bridge update.
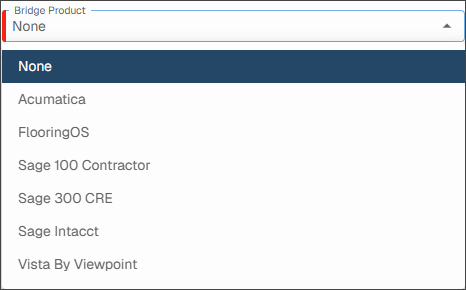
The vault "bridge" connects the pVault® system to Acumatica. The bridge provides all of the data lookups and exporting features needed to run pVault.
Once the Bridge Type and Bridge Product fields are populated in Vault Bridge Settings, you can access the Validation Configuration grid fields.
The Connection Url field should systematically populate. If it does not, enter your company's Connection Url in this field.
Important
The Connection Url value must end with:
/entityIn the Company Id field, enter your company ID.
In the User Name field, enter your username.
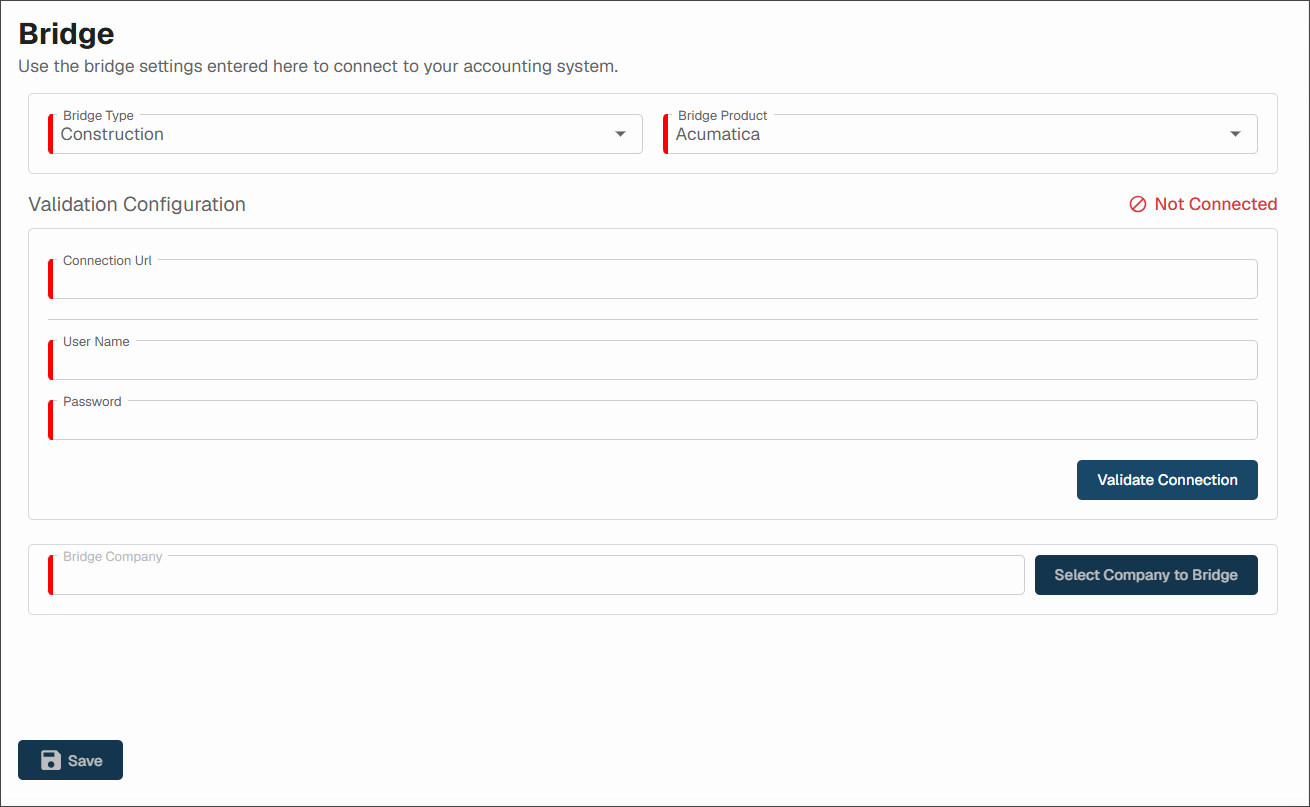
In the Password field, enter the associated password.
Click .
The page updates to confirm your connectivity and the Bridge Company field displays.
Note
Once bridged, if you need to change the password associated with the Company Id, click .
Click to access your Bridge Lookup list similar to the following:
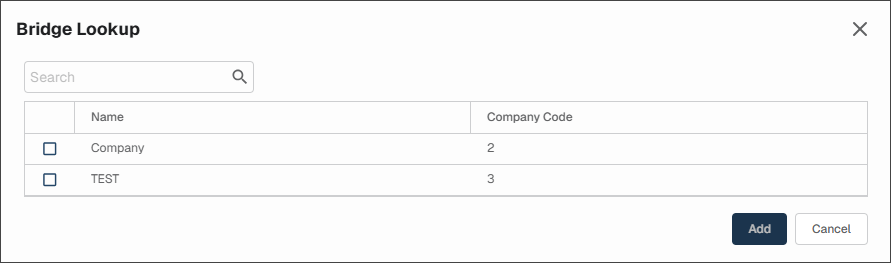
Click the check box associated with your bridged company.
Click .
Click .
Important
If you bridge to Acumatica and our customization is not installed in Acumatica, you can log in to view what customization is required. However, the Download Customization button is not visible.
After you are done bridging and have validated the connection, click .
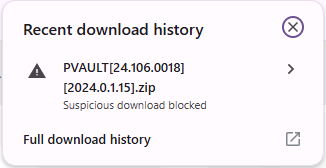
The file downloads similar to the following:
Open the download folder.
Right click on the file and click .
A dialog similar to the following displays:
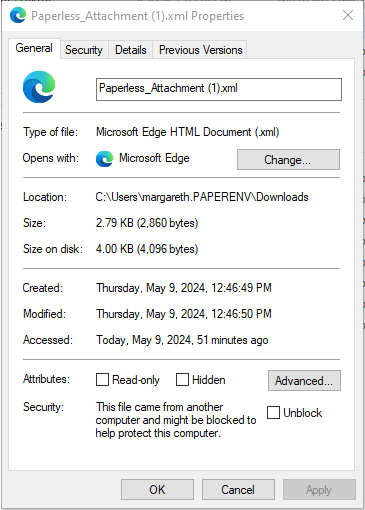
Verify that the Unblock check box is selected. If it is blank, select it.
Click to close the dialog.
Import Customization Project
To upload the customization project deployment package, import the project using the Customization Projects (SM204505) form.
Log in to the Acumatica instance under the tenant being integrated to pVault®.
From Systems, click .
Click .
Select .
The Customization Projects window similar to the following displays:
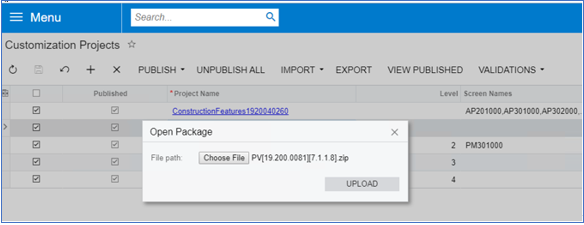
In the form toolbar, click .
The Open Package dialog displays:
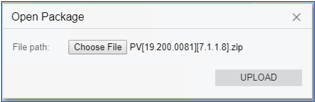
In the File path field, select the deployment package file to be uploaded.
Click .
Publish Customization Project
To publish customization projects, the following actions must be performed on the Customization Projects (SM204505) form.
Log in to the Acumatica instance under the tenant being integrated to pVault®.
From Systems, click .
Click .
Select .
The Customization Projects window similar to the following displays:
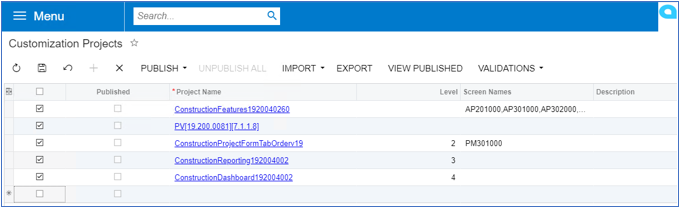
In the Project Name column, click the associated check box(es) in the unlabeled column at the far left for the customization projects to publish.
Important
Be sure to include all existing items, previously published customizations and the new pVault PV customization.
Click to initiate publication of the selected projects.
Warning
Active website users are logged out.
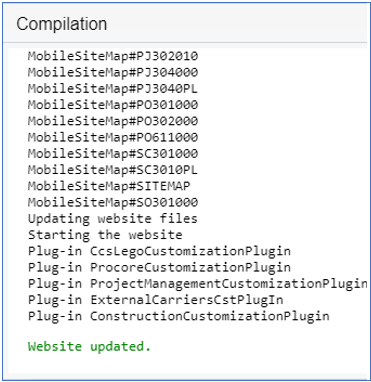
A Compilation window similar to the following displays:
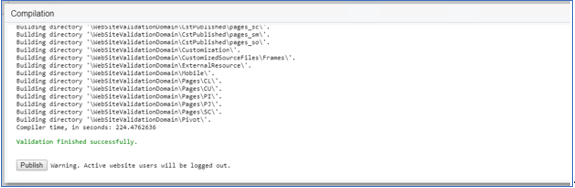
After the compilation is complete, click to finalize publication.
The Compilation window resembles the following:
Update Customization Project
To update the PV Customization Project to a new version, perform the following actions.
Log in to the Acumatica instance under the tenant being integrated to pVault®.
From Systems, click .
Click .
Select .
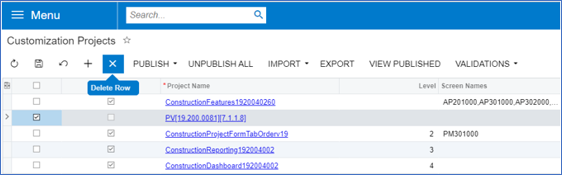
The Customization Projects window similar to the following displays:
Follow the steps to import the updated Customization Package. See Import Customization Project.
Clear the previously checked boxes (in the unlabeled column) and check only the check box for the new PV Customization.
On the toolbar, click to initiate publication of the selected project.
Warning
Active website users are logged out.
After the Compilation is complete, click to finalize publication.
To remove the previous PV custom project after it is unpublished, select the row to highlight it and then click the X in the toolbar, (Delete Row). Then, click .
Remove Customization Project
To remove the pVault® customization project from publication, complete the following steps:
Log in to the Acumatica instance under the tenant being integrated to pVault.
From Systems, click .
Click .
Select .
The Customization Projects window similar to the following displays:
In the Project Name list, be sure the boxes are checked associated with projects that should remain published and clear those check boxes for the PV customization project.
On the toolbar, click to initiate publication of the selected project.
Warning
Active website users are logged out.
After the Compilation is complete, click to finalize publication.
Remove the previous PV custom project after it is unpublished, select the row to highlight it.
Click the X in the toolbar to delete the row.
Click .
Then, remove the endpoint from the Acumatica database:
From Integration, click .
Select for the endpoint name.
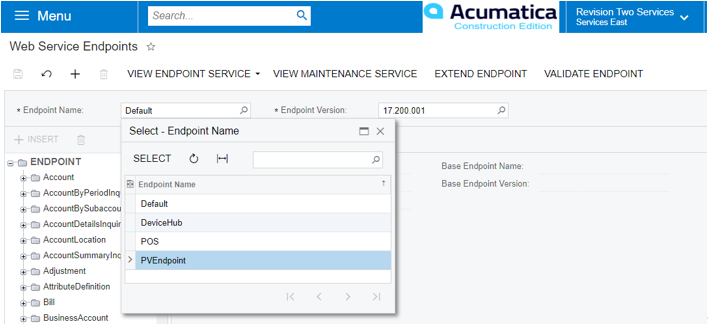
Select Endpoint Version matching the customization being removed.
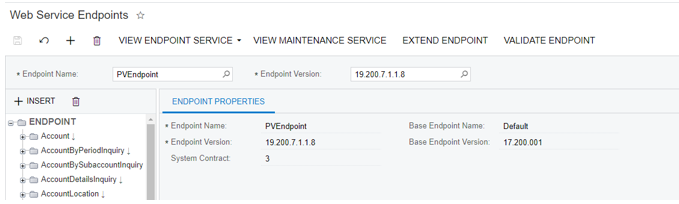
Click the Delete
 icon to remove the endpoint from the database.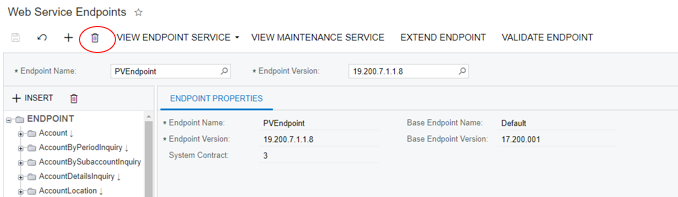
To view Bridge Lists or Sync Errors, click .
A dialog similar to the following displays:
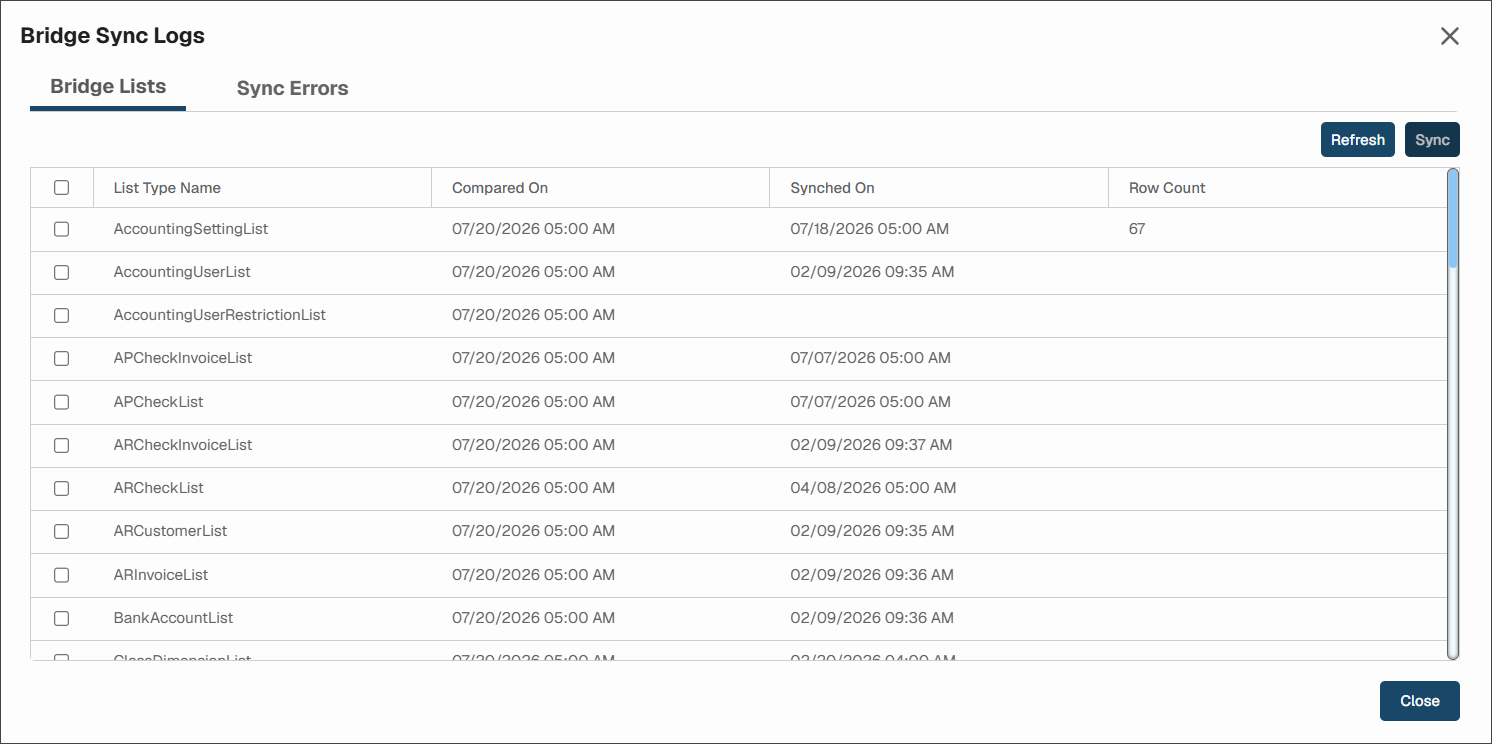
Select individual lists or the check box in the header to select all lists to be synced. Then, click .
Sync Errors
pVault® support personnel use the data that displays in the Sync Errors tab for issue troubleshooting.
The vault "bridge" connects the pVault® system to FlooringOS. The bridge provides all of the data lookups and exporting features needed to run pVault.
Once the Bridge Type and Bridge Product fields are populated in Vault Bridge Settings, you can access the Validation Configuration grid fields.
The Connection Url field should systematically populate. If it does not, enter your company's Connection Url in this field.
In the API Key field, enter your company's appropriate key.
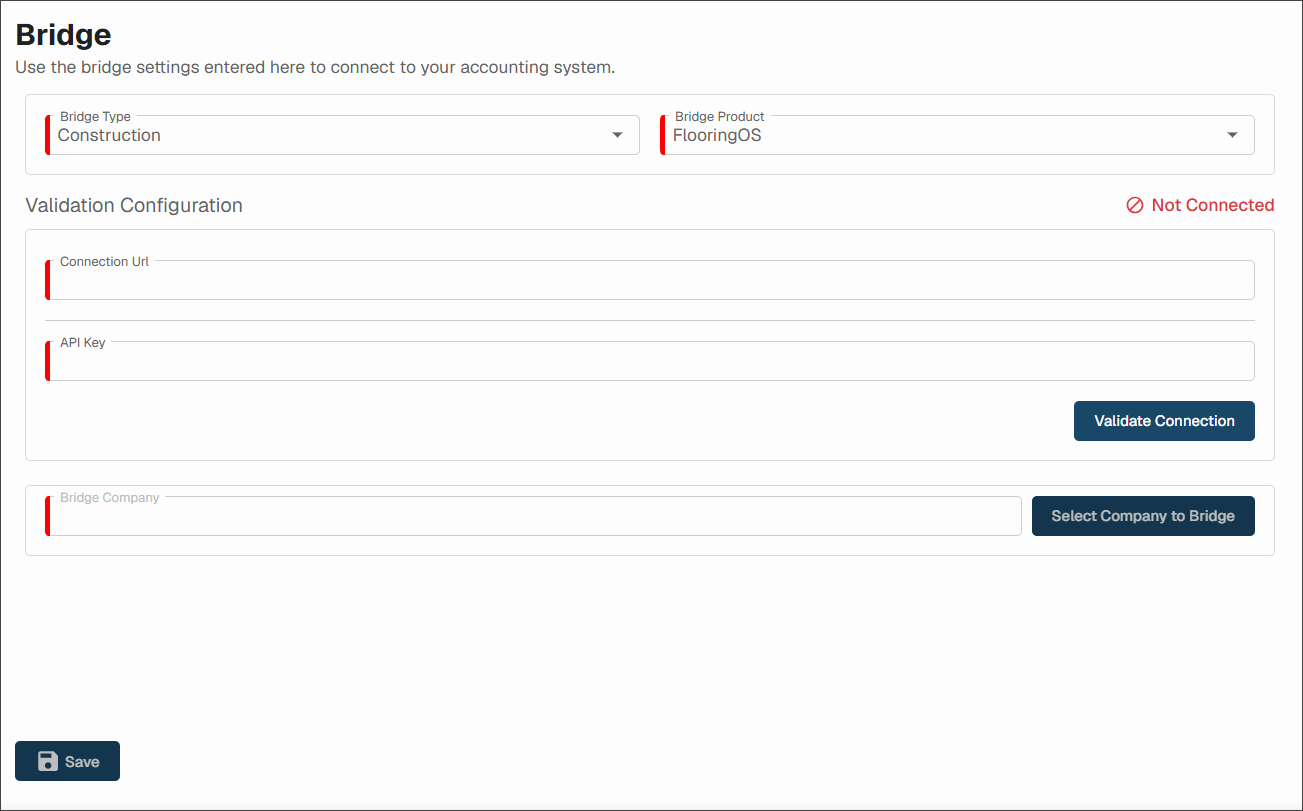
Click .
The page updates to confirm your connectivity and the Bridge Company field displays.
Note
Once bridged, if you need to change the password associated with the Company Id, click .
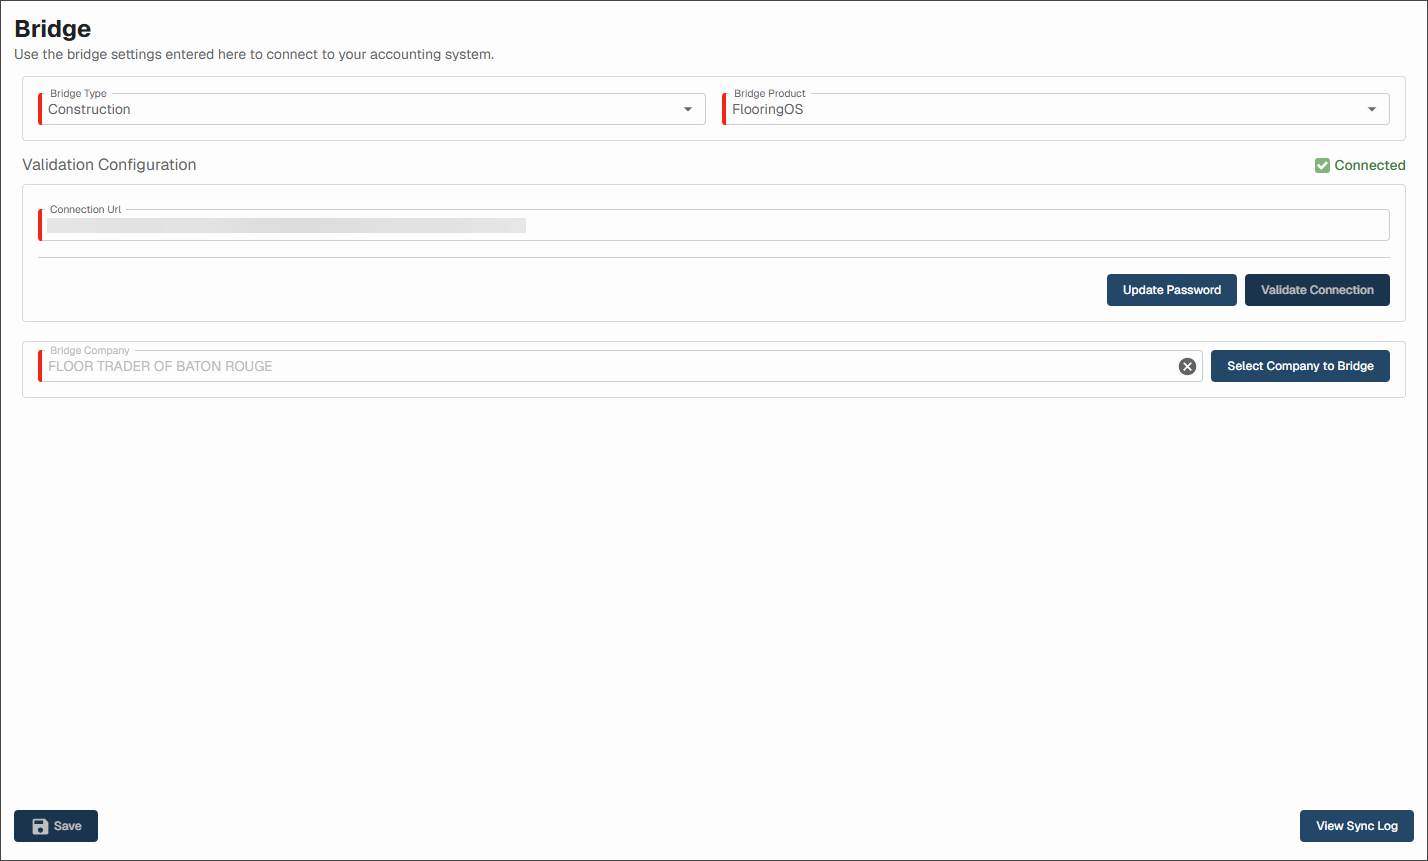
Click to access your Bridge Lookup list similar to the following:
Click the check box associated with your bridged company.
Click .
Click .
To view Bridge Lists or Sync Errors, click .
A dialog similar to the following displays:
Select individual lists or the check box in the header to select all lists to be synced. Then, click .
Sync Errors
pVault® support personnel use the data that displays in the Sync Errors tab for issue troubleshooting.
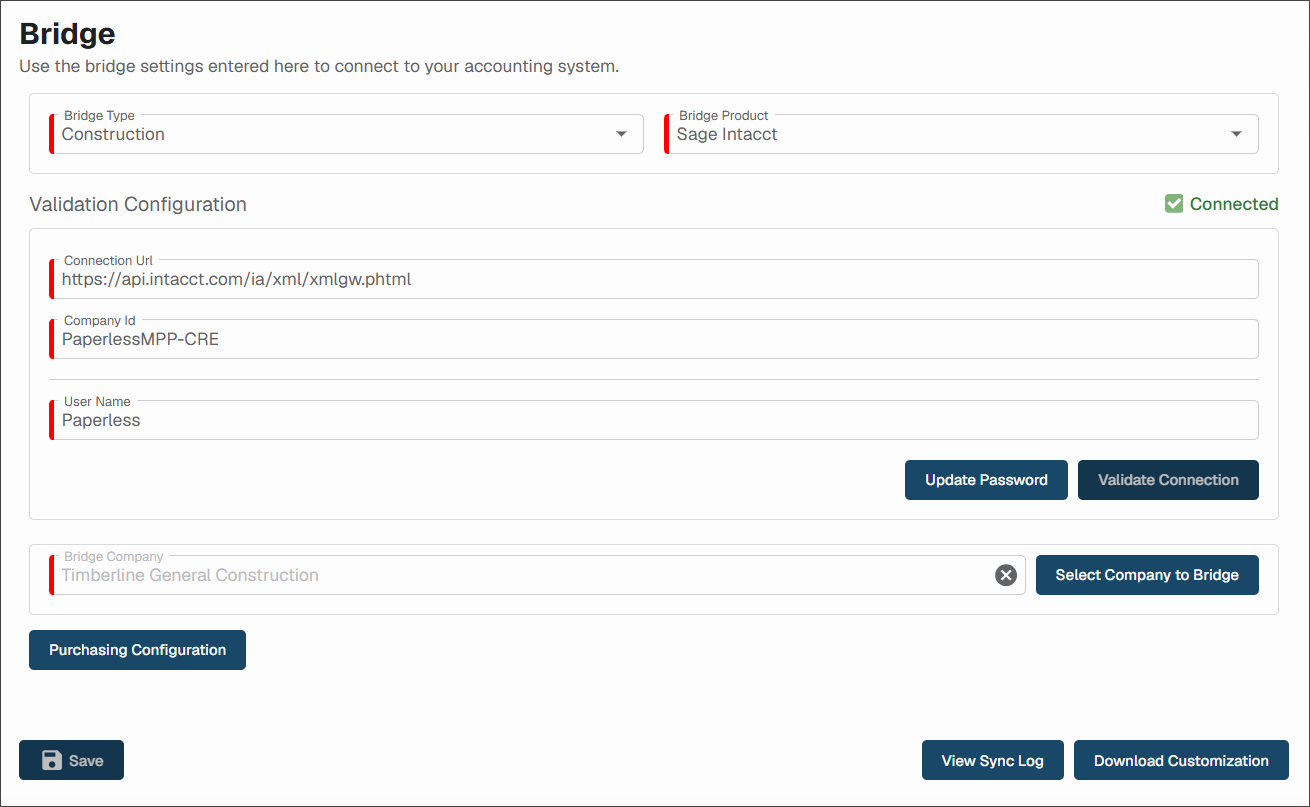
The vault "bridge" connects pVault® to Sage Intacct. The bridge provides all of the data look-ups and exporting features needed to run the pVault system.
Once the Bridge Type and Bridge Product fields are populated in Vault Bridge Settings, the Validation Configuration fields are accessible.
Complete the following steps:
The Connection Url field should systematically populate. If it does not, enter your company's Connection URL manually in this field.
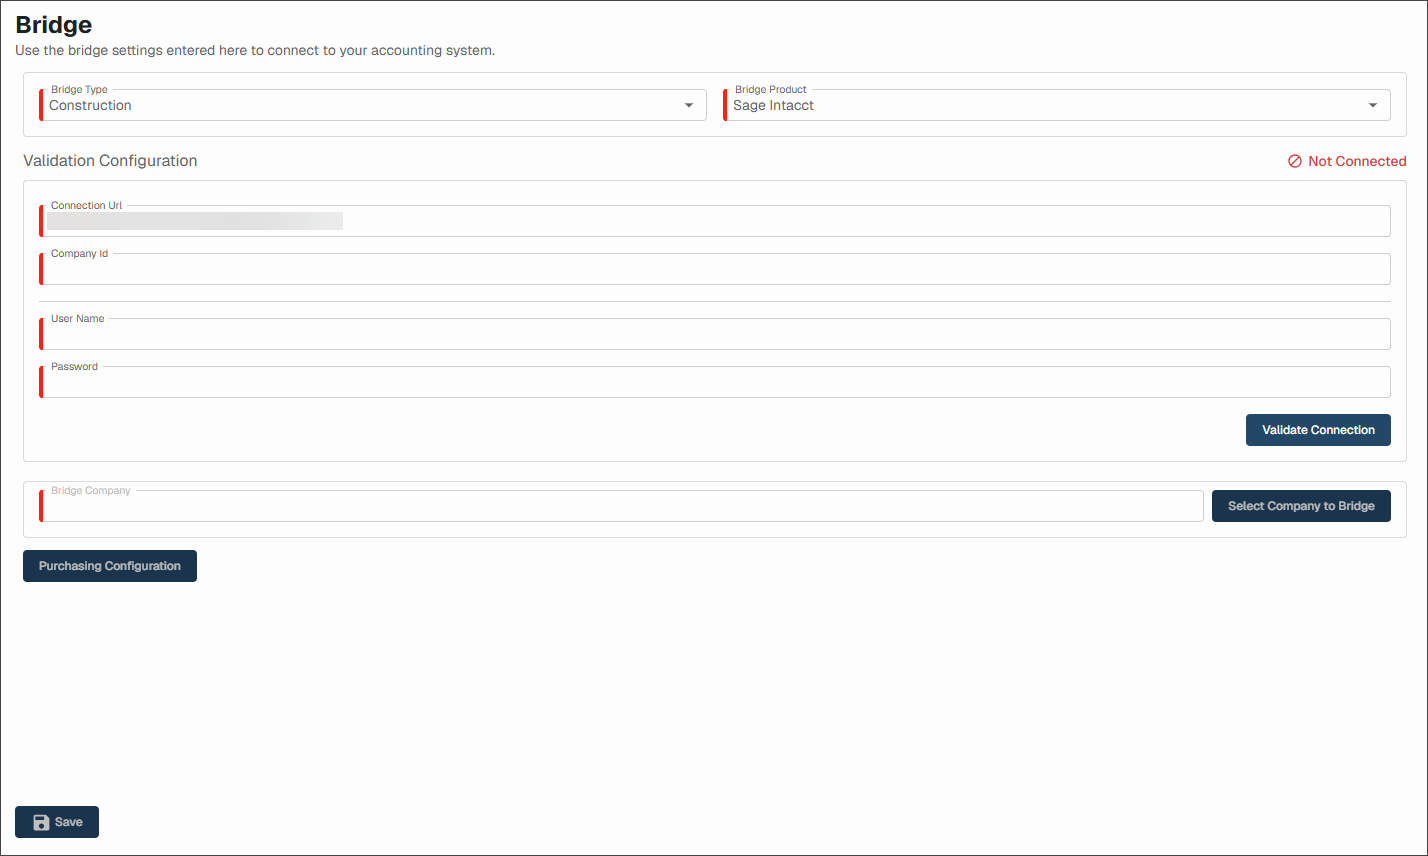
In the Company Id field, enter your company id.
In the User Name field, enter your user name.
In the Password field, enter the password associated with your account.
Click .
The page updates to confirm your connection and a Bridge Company field displays:
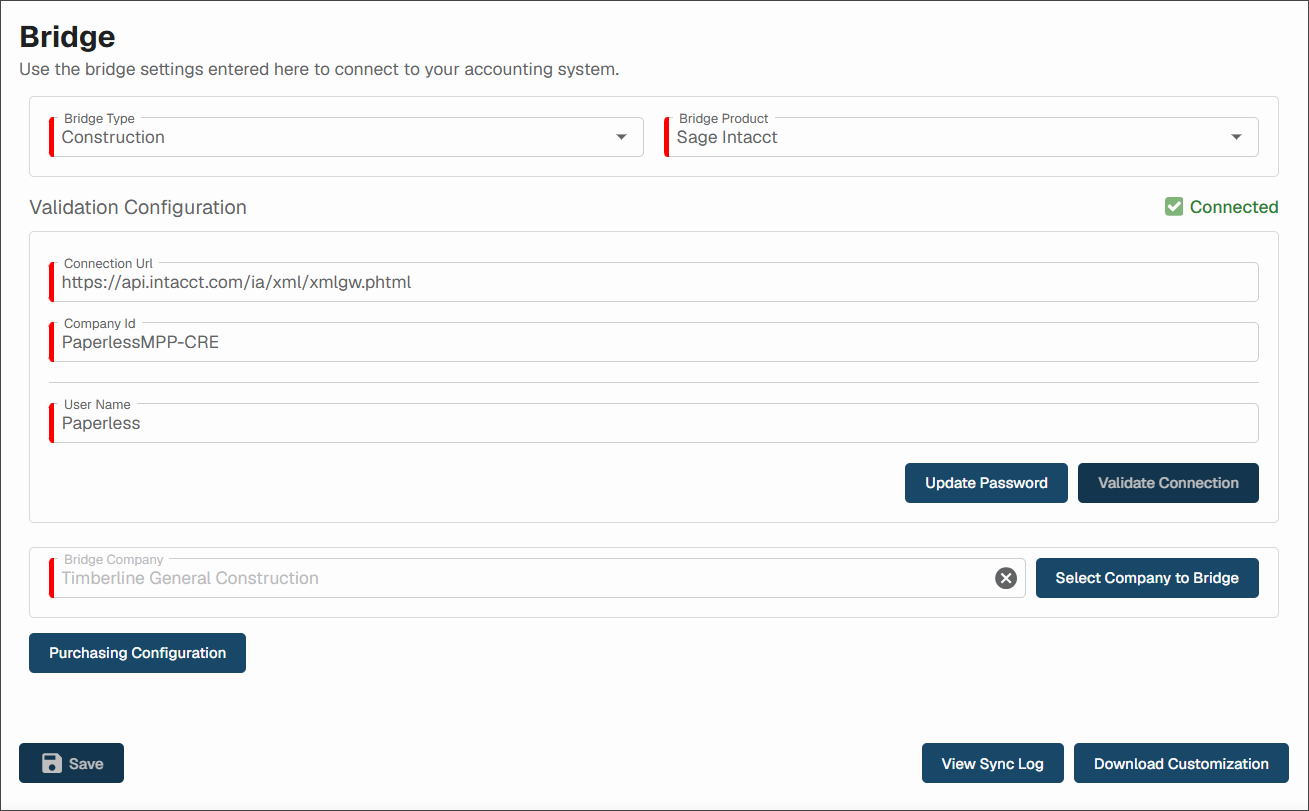
Note
Once bridged, if you need to change the password associated with the Company Id, click .
Click to access your Bridge Lookup list similar to the following:
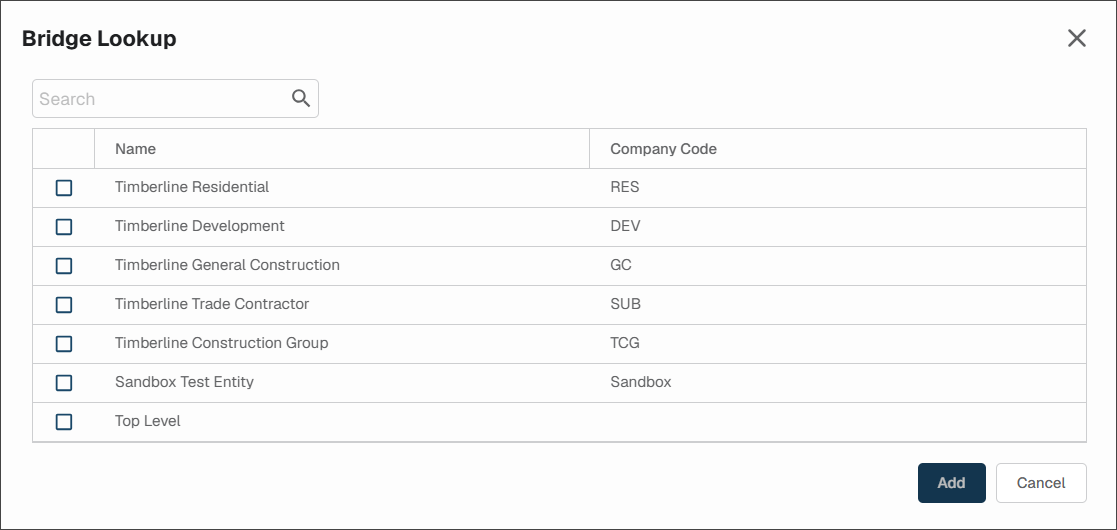
Select the check box associated with your bridged company.
Click .
Click .
To map your transactions, refer to Purchases Configuration.
After bridging to Sage Intacct from pVault, a Paperless Integration application is systematically installed in Sage Intacct.
The application facilitates the systematic syncing of data from Sage Intacct to pVault as data is added, edited or deleted in Sage Intacct. You can access this application in Sage Intacct under the Platform Services menu.
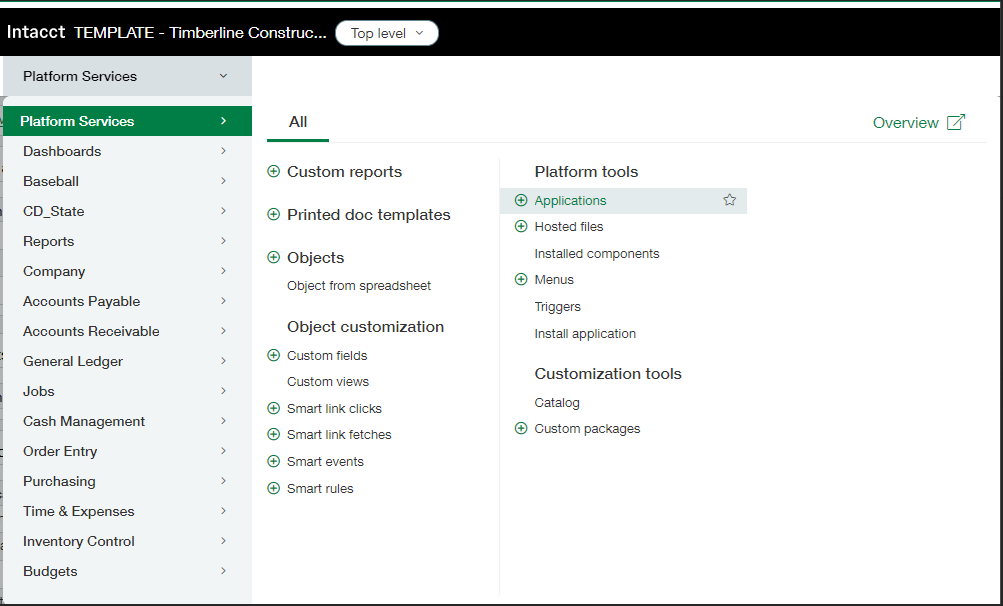 |
From here, you can view the Paperless Integration. No action is needed to facilitation the install or the update of the Paperless Integration application.
Instead of having a section for Purchase Orders and another for Subcontracts, Intacct implemented configurable transactions and workflows in their Purchasing module. These transaction types can be configured to fit your company's needs.
To integrate pVault® with Intacct's Purchasing module, you will need to map your transactions into our provided line types. You can map multiple transactions to the same line type.
In Intacct
Navigate to the Purchasing module.
Click the tab.
In the More section, click .
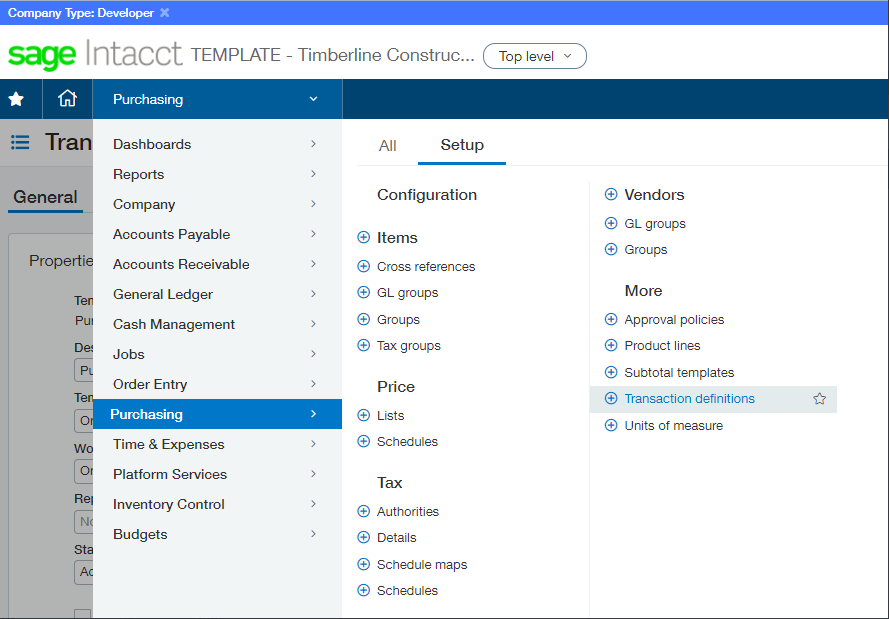
In the Transaction Definitions: Purchasing page, identify transaction definitions, descriptions and workflow categories based on your company's needs.
For example:
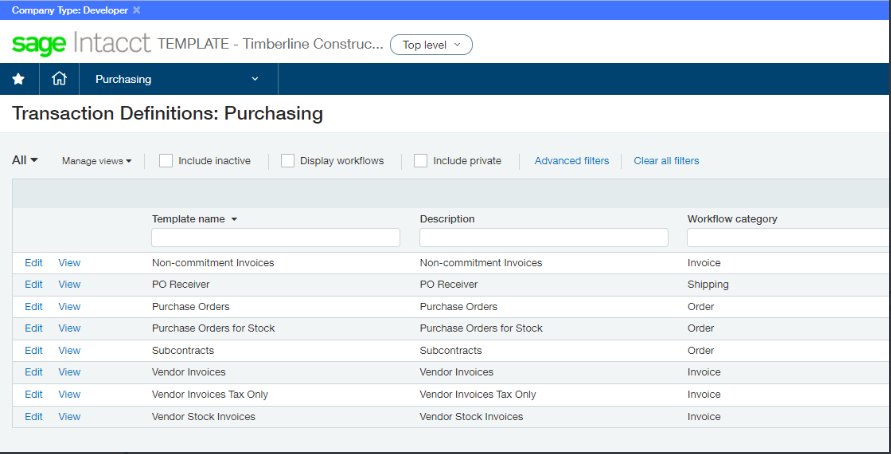
Be sure to make a note of how you configured your company's purchasing transactions.
Edit Subtotal Dimensions at the Top Level Setting
To edit dimension values on subtotal lines at the top level, complete the following steps:
From the Purchasing toolbar dropdown, click .
Under the Enable functionality dropdown, select check box.
Click .
With this functionality selected, dimension amounts distributed either systematically or manually may be edited as needed.
In pVault®
From My Paperless, click .
In the APFlow™ Settings navigation bar, click .
A page similar to the following displays:
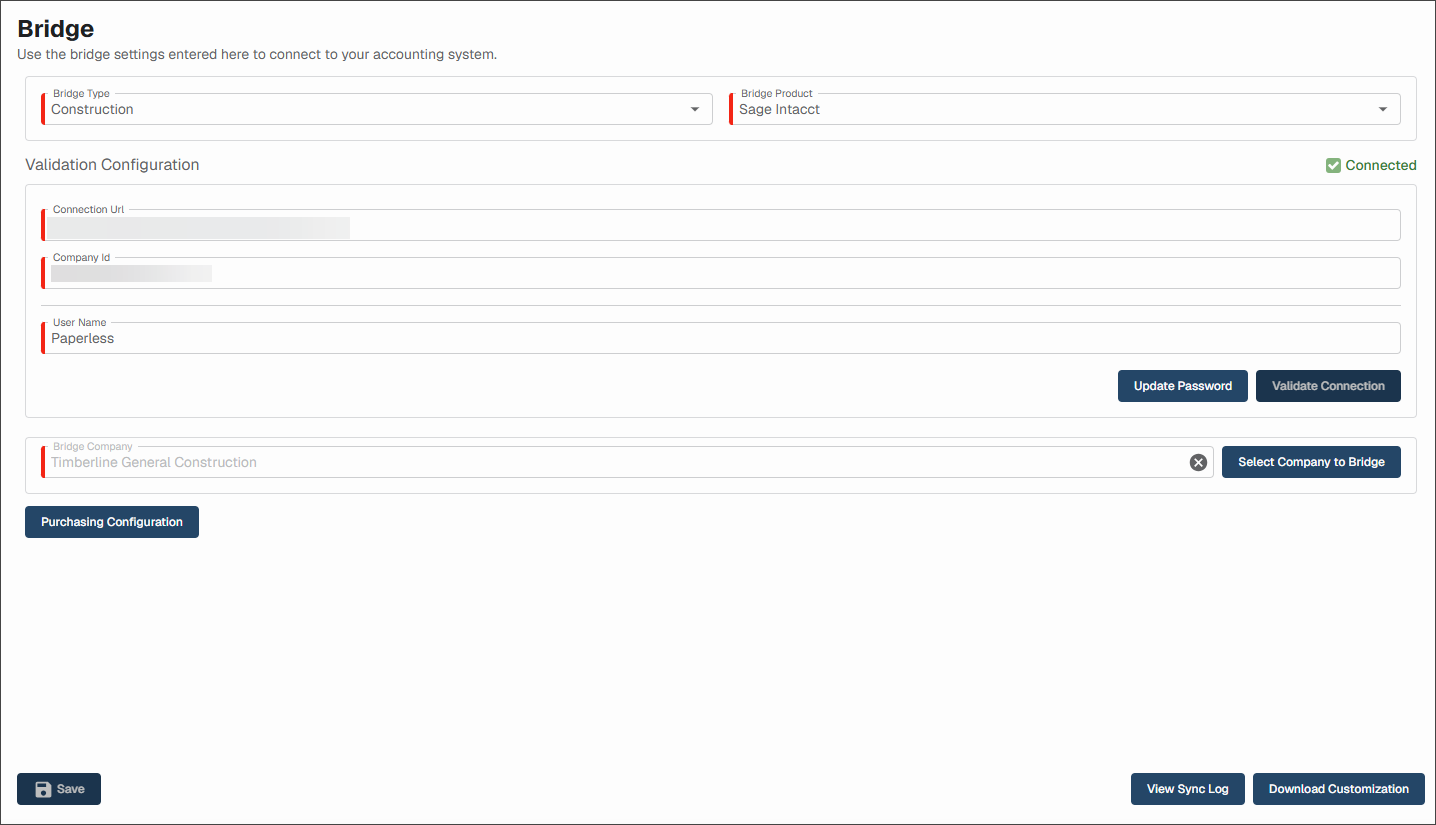
Click .
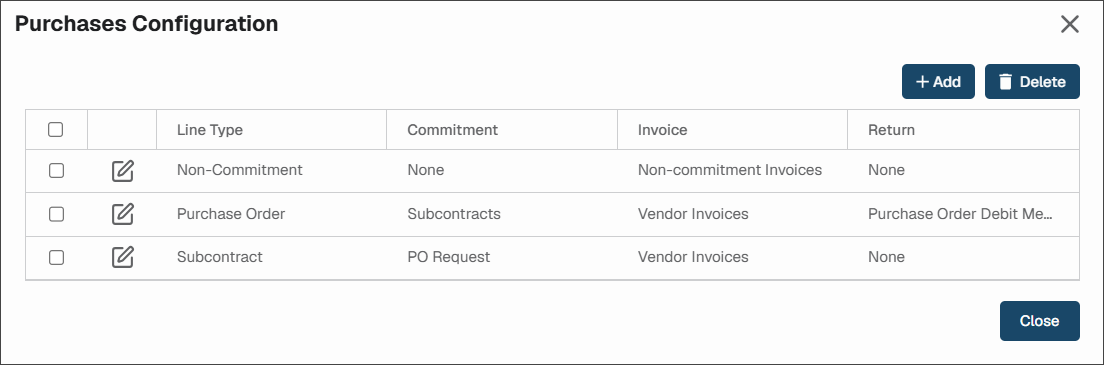
The Purchases Configuration dialog displays:
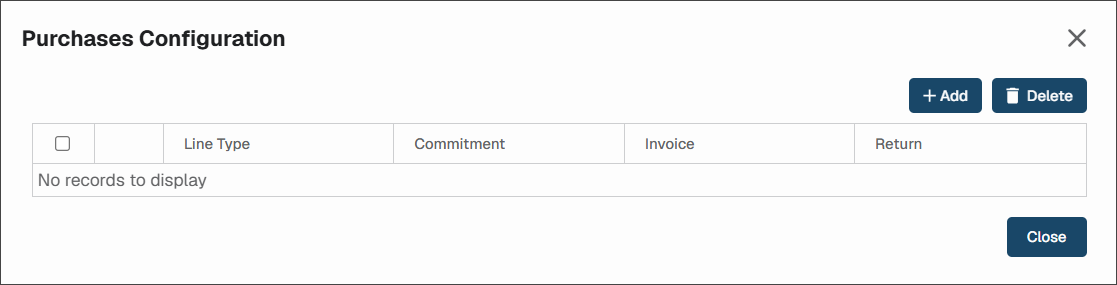
Click .
The New Purchase Configuration dialog displays:
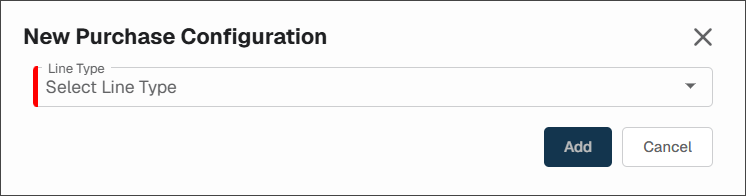
From the Line Type dropdown, select the purchase transactions that you configured in Intacct. See In Intacct for more information.
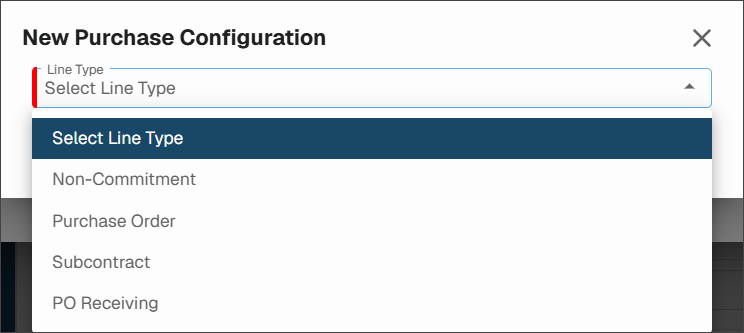
The fields that display are based upon the line type you select. In this instance, PO Receiving, was selected. These are the fields that display to support that selection:
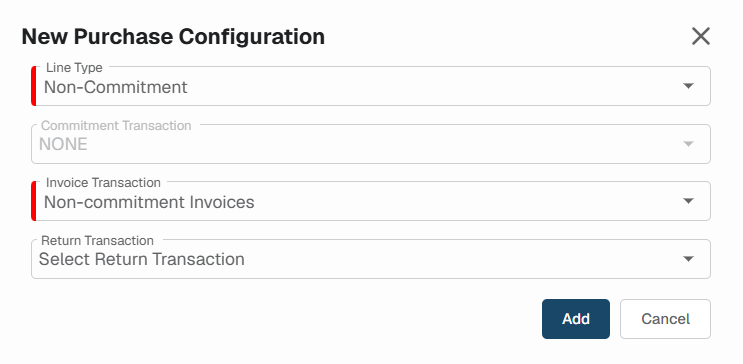
Click .
Non-Commitment: Used for creating invoices in the Purchasing module that do not convert from another transaction type. You can map invoice template type transactions that have a create policy of new document only or new document or convert.
Purchase Order: Used for processing purchase orders that can be converted to an invoice. You can map order template type transactions that can be converted to an invoice template type transaction that has a create policy of convert only or new document or convert.
Used for processing subcontracts that can be converted to an invoice. You can map order template type transactions that can be converted to an invoice template type transaction that has a create policy of convert only or new document or convert.
PO Receiving: Used for processing purchase orders that you receive first before converting to an invoice. You can map list template type transactions that can be converted to an invoice template type transaction that has a create policy of convert only or new document or convert.
Debit Memo: Used for processing returns for items already invoiced. You can map an invoice template type transaction with a return workflow category to any of the existing mappings by selecting the transaction from the return transaction dropdown list. The transaction needs a create policy of convert only or new document or convert.
A completed Purchases Configuration dialog resembles the following:
As data is added to the Sage Intacct accounting system, that information is systematically synced to pVault®. However, if there is data you know was added or you added it yourself and it is not visible, click where you can manually submit a request for the sync process to run.
A dialog similar to the following displays:
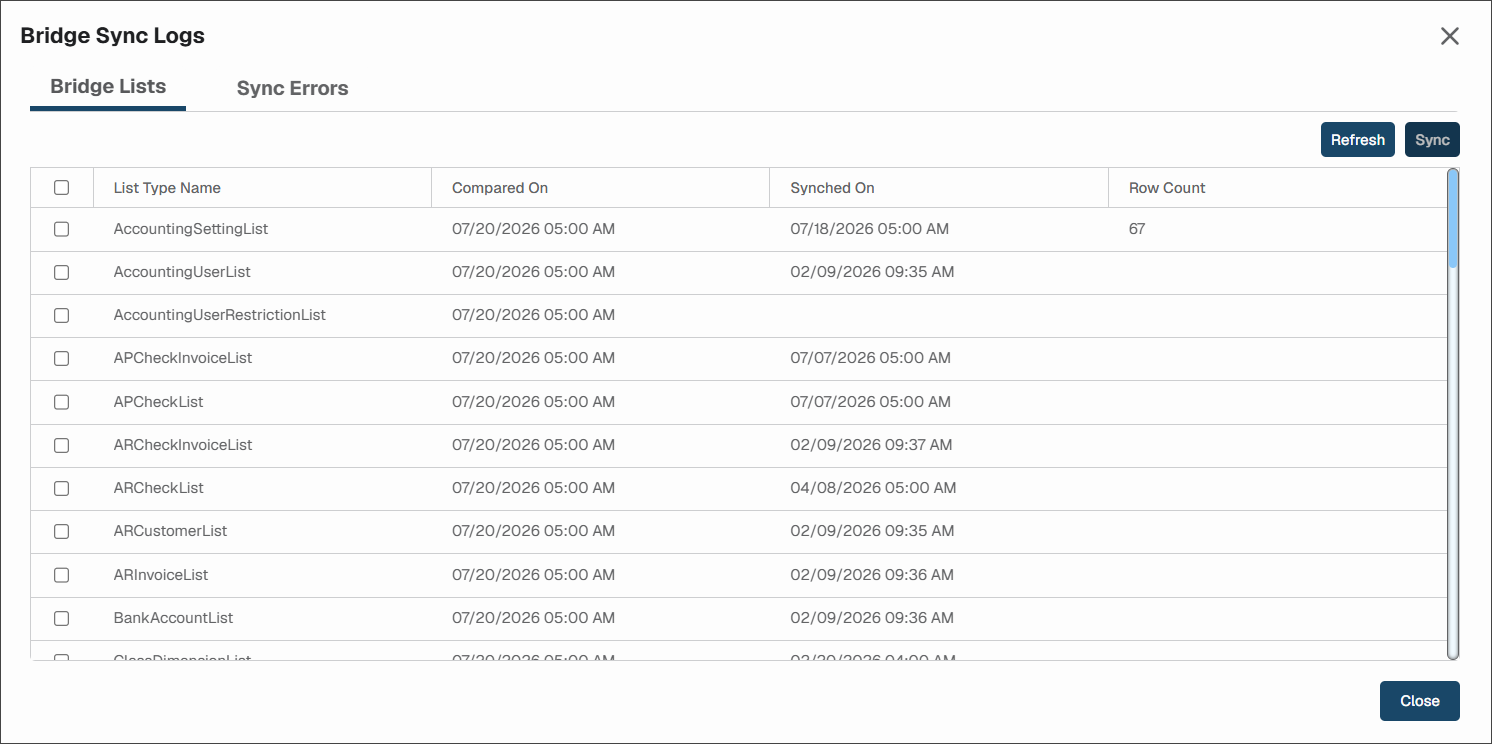
Select individual lists or the check box in the header to select all lists to be synced. Then, click .
Sync Errors
pVault® support personnel use the data that displays in the Sync Errors tab for issue troubleshooting.
Prior to connecting pVault® to Vista™ by Viewpoint via the vault "bridge," the Paperless Environments support team must manually configure connection in Trimble's integration platform called App Xchange. App Xchange serves as a centralized hub that connects and synchronizes data between applications like Vista by Viewpoint and pVault Cloud.
After the App Xchange set up is underway, support assists in configuring the bridge, as it requires a coordinated sequence of steps between the two systems.
When support lets you know it is time to configure the bridge in pVault, complete the following steps:
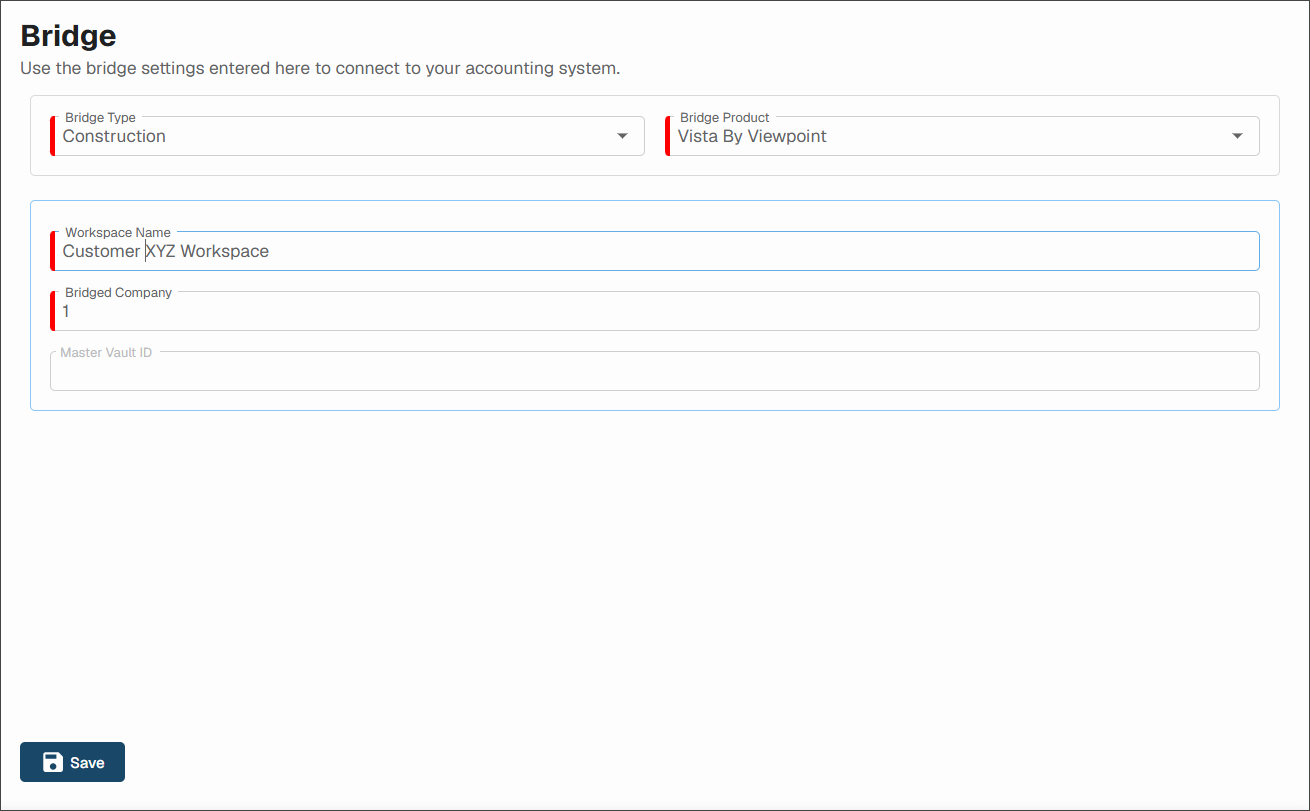
Select .
In the Bridge Type field, select .
In the Bridge Product field, select .
In the Workspace Name field, enter the name provided by support.
This name must match the workspace name in App Xchange exactly.
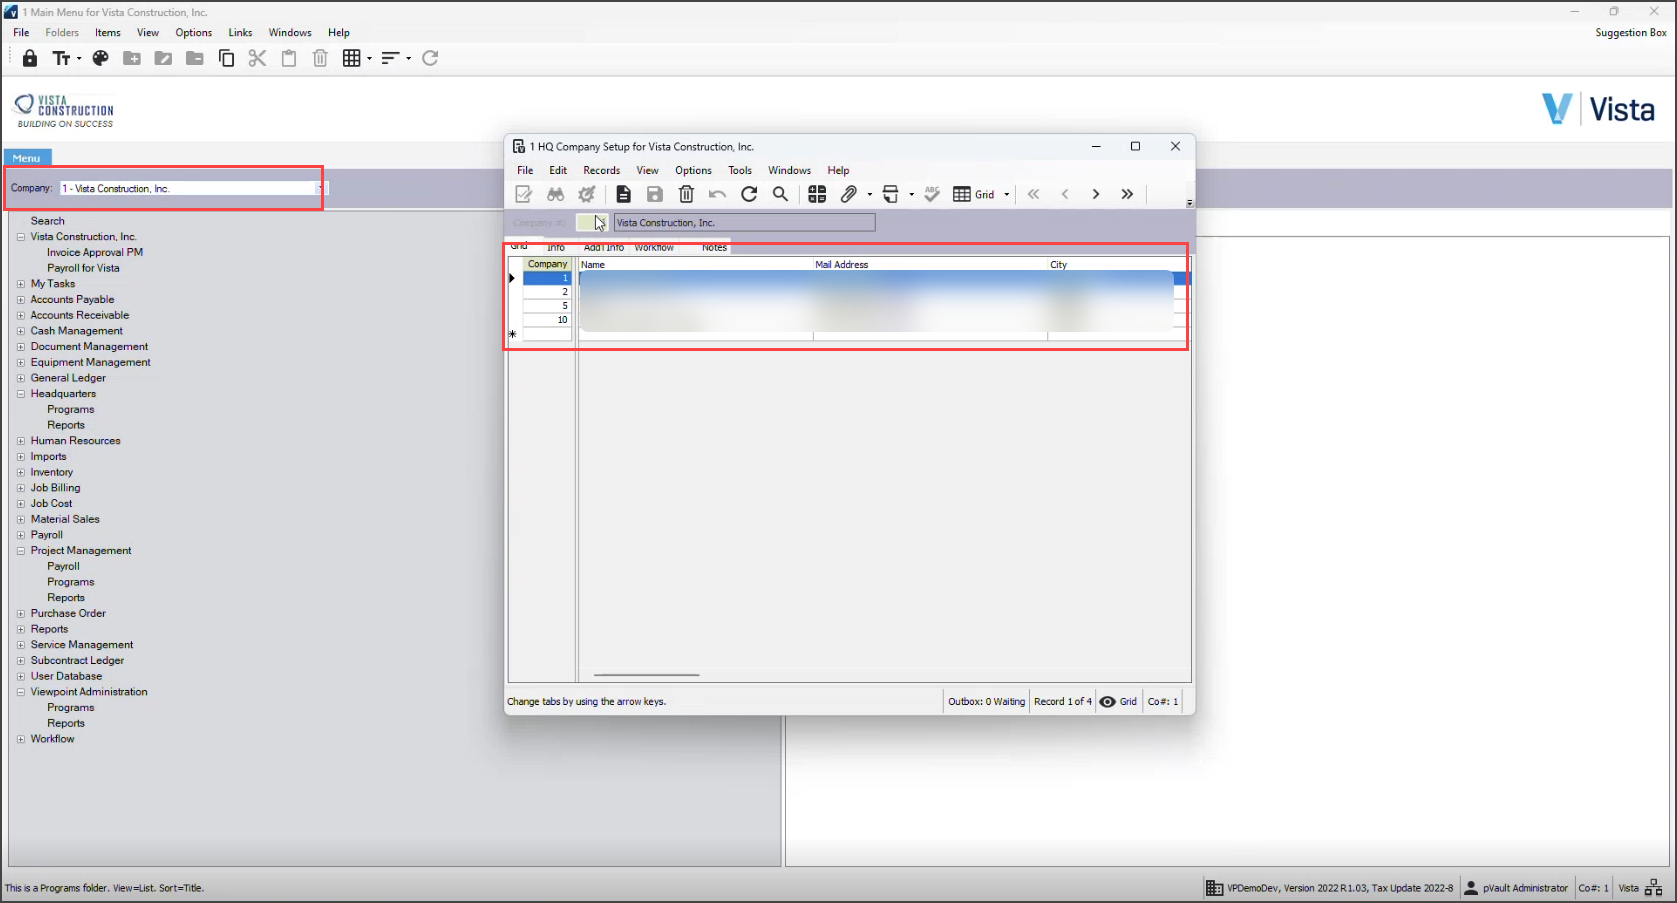
In the Bridged Company field, enter the number of the Vista company you want to bridge.
Note
To locate this value, log in to Vista Construction. The various companies can be found in the Company dropdown or by navigating to .
Click .
Upon saving, the Master Vault ID value is generated.
Provide the Master Vault ID number to support so they can use it to complete the Vista <> Paperless connection in App Xchange.